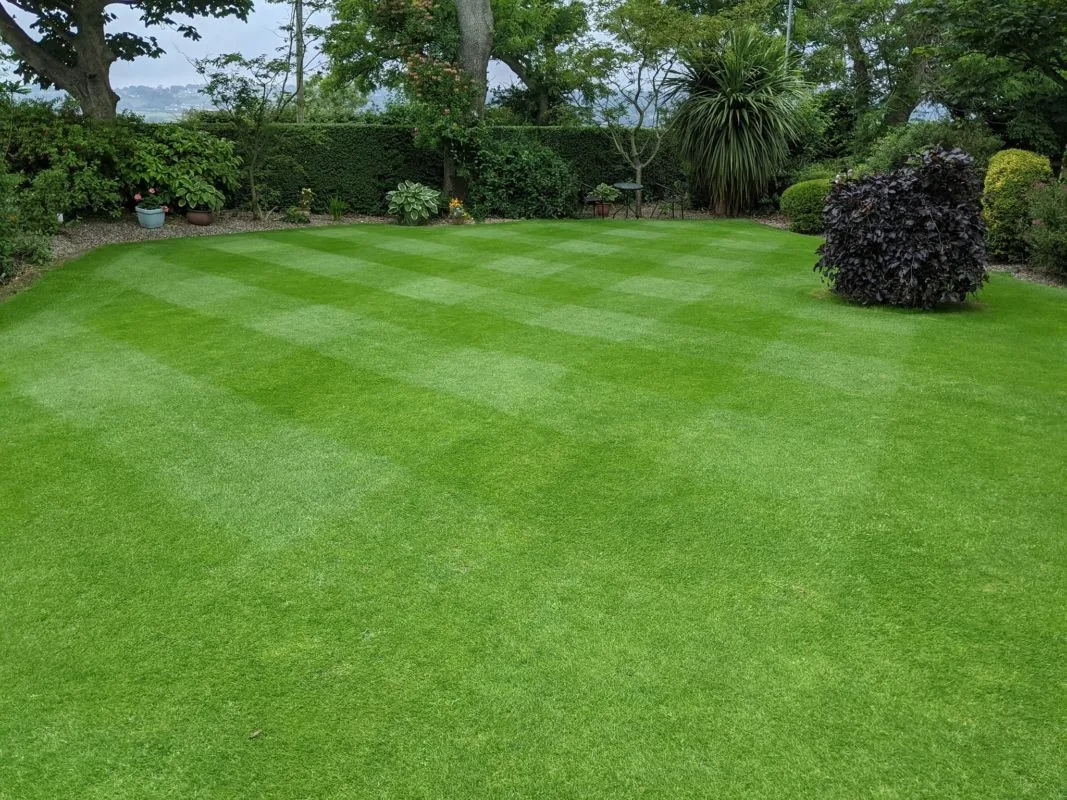
Some easy to follow beginner DIY lawn care tips for beginners that work – even more experienced gardeners will find helpful information in this article.
Visitors to my YouTube channel and social media groups often want to know how to transform their disappointing lawn into the stunning green carpet of their dreams. These are my top 10 beginner lawn care tips that work. I’ve started with the easiest, cheapest and most achievable things that will start you on your journey to becoming a lawn care aficionado.
- Mow your lawn little and often
- Raise the cutting bar on your lawnmower
- Keep the lawn clear of fallen leaves, toys, furniture and other everyday items
- Feed your lawn regularly
- Encourage pets not to use the lawn as a toilet
- Aerate your lawn at least once a year
- Scarify once or twice a year
- Overseed in spring or autumn with a carefully chosen seed mix
- Do what you can to make sure that your lawn gets the maximum amount of sunlight
- Don’t give up if Mother Nature throws you a curveball
Mowing Your Lawn
I’ve chosen mowing for the first of my 10 beginner DIY lawn tips because it’s by far the most important aspect of lawn care. Mowing correctly will encourage the grass plants to make more shoots, which, in turn will make your lawn look thicker and give it a really inviting texture.

Mowing regularly is a great, chemical free way to keep weeds under control. That’s not to say you won’t need to treat weeds as part of your lawn improvement program. But once they’re gone, a thick sward of grass is difficult for new weeds to establish themselves into. And if you do get the occasional rogue plant in there – many weeds hate having their heads chopped off and quickly give up the ghost.
When your lawn is a nice even length – with no clumps or stalks, you can get away with having a bit of moss in the bottom of it, or the occasional weed. Your lawn will immediately look better – you can deal with the details at the appropriate time of year.
Raise The Cutting Bar Of Your Lawn Mower
Still on the subject of mowing – because it is a big subject and in my opinion 85% of a lawn’s appearance is down to the way it is cut.
Don’t be tempted to scalp your lawn in the hope of creating a bowling green effect in your garden. Those close mown lawns are the result of decades of research and expertise. They have specially formulated growing media, expensive drainage systems and carefully researched seed mixes. Plus they are mown every day with specialist mowers. Those bowling green lawns are beautiful, but they do need intensive care and they won’t tolerate a lot of wear and tear.
If you are just starting out, and you want to improve your family lawn, aim to maintain it at around 5-8cm cutting height. This length gives the plants plenty of leaf mass so that they can harvest energy from the sun and grow strong healthy roots and leaves.
Remember the 1/3 rule. It’s the one golden rule of mowing. NEVER remove more than one third of a plant’s leaf mass in a mowing session. If your lawn is 9cm long when you start mowing, it should be no more than 6cm long when you’ve finished. If you want it shorter than that – wait a couple of days before you remove another third of it’s length.
Keep Your Lawn Free Of Debris
This is one of the simplest beginner DIY lawn tips but it’s right up there near the top of my list. In all my 30 odd years of creating and caring for lawns and golf greens, I’ve seen more damage caused lawn debris than anything else.
Grass plants need water, sunlight and fresh air. If you deprive them of any one of those things, they will literally curl up and die.
Have you ever noticed, that when you move your children’s paddling pool that has been on the lawn for a fortnight, you have an ugly yellow mark on your lawn that seems to linger forever? That’s because the plants have become weakened by lack of sunlight (they use sunshine to make some of their food). Poor air flow will probably have encouraged fungal lawn diseases to attack the plants, weakening them even further. And guess what – when the grass plants get weakened, weeds will make the most of the opportunity and invade the area.
So – tidiness is important. Try to move lawn furniture around at least every couple of days. Collect the toys up at the end of the day, and in autumn, you need to be removing fallen leaves on a daily basis.
Your Lawn Feeding Regime
Plant nutrition is a huge and complicated subject. So lets keep it simple to begin with. There are lots of blogs on my website that dig deep into the nutritional needs of a lawn. And I’d encourage you to read them when you’re ready, but don’t overwhelm yourself. You’ll see that my number 10 beginner DIY lawn tip is to be kind you yourself, so when it comes to lawn feeding advice I’m just going to give you three tips.
- Feed your lawn regularly – every 6 weeks or so is a good routine to get into
- Use the right lawn feed for the time of year
- Invest in a fertiliser spreader and learn how to calibrate it.
You’ll find lots of information about basic lawn feeding in this blog. For your first year as a lawn care beginner, I’d advise you to stick with proprietary lawn feeds to balance the nutrient levels in the soil. And if you feel your lawn could be greener, and you have the time to do it, a monthly application of foliar feed will really help to strengthen the plants.
Lawn vs Dog
As a dog lover myself, I know how hard it is to balance having a beautiful lawn and a happy pet. Urine damage looks so ugly on a lawn and it’s something I’m often asked about.
There is a product on the market called Dog Rocks. Some lawn lovers swear by it and say it helps to reduce the damage caused by dog pee. If you want to give it a try, you can order dog rocks from Amazon.

However, if you do have enough room in your garden, it’s well worth creating an area where your dog can relieve him or herself without affecting your lawn. Perhaps use a pretty fence or a screen to cordon off a sensory garden for your pet. Use a nice absorbent surfacing like gravel or bark mulch, add plenty of interesting scents and features, and Fido won’t be the least bit interested in ruining your lawn.
Aeration
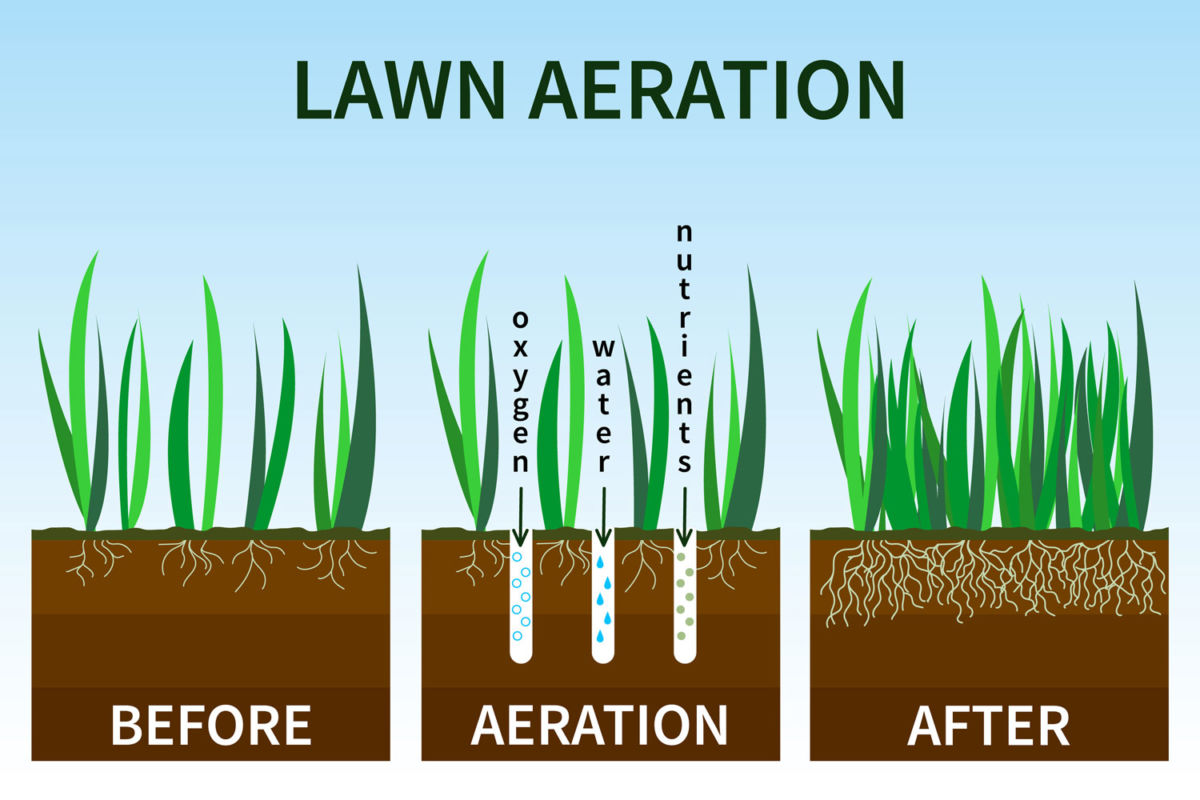
Aeration makes a huge difference to a lawn and it’s relatively easy to do. The idea of aeration is to open up the structure of the soil beneath your lawn so that the grass can grow longer and stronger roots. In addition, aeration will help your lawn to soak up water. Rain water will be able to filter down to where it’s needed and if you are irrigating, it’ll be much more effective.
I recommend aerating your lawn at least once a year. Either in spring or in autumn. You’ll do no harm by carrying this out in spring AND autumn. And if your soil is particularly compacted you’ll see the benefits within days.

Scarification
Imagine if you were unable to wash your face. How all of that every day grime would gradually build up and stop your skin from functioning properly. You might get infections, inflammation and you certainly wouldn’t be as good looking as you should be.
Scarification is the lawn care equivalent of washing and exfoliating your skin. It gets rid of accumulated debris like dead leaves, moss and the occasional weak plant. This gives the plants room to grow sideways, it allows water to filter through into the soil instead of sitting on the lawn surface. And, most importantly, it takes away the material that common lawn diseases thrive in.
You can use a spring tine rake to scarify your lawn, but I would advise either hiring a mechanical scarifier or asking a lawn care professional to help you.
For most lawns, scarifying once a year – either in spring or autumn is normally enough.
Overseeding to thicken up the sward
My Beginner DIY Lawn Care tip for anyone whose lawn is looking a bit sparse, is to overseed it with a good quality grass seed mix that will suit your garden.
Start by scarifying and aerating the lawn. You need to create the best possible conditions for the new seed to germinate in – otherwise you might as well not spend the money.
Choose a mix of grass species that are the best match for your soil type, light levels and the way you use your lawn. For overseeding, I’d advise a sowing rate of around 20 grams per square metre.
See my recommended grass seed mixes for a family lawn
Learn more about types of grass seed here
Sunlight and Ventilation
Grass plants need sunlight to thrive. Even the shade tolerant grass species cannot grow in perpetual darkness. And you’ll find, that where your lawn lies in the shadow of trees and hedges, you are more likely to have problems with moss and/or lawn diseases.
If possible, try to make sure your lawn gets as much sunlight as possible and that there is a good airflow across the lawn. That might mean trimming hedges, pruning trees or even reconsidering the shape and size of your lawn. There’s no shame in having a path or a wide border with ferns and hellebores between the hedge and your lawn.
Be Patient With Yourself
Remember that Mother Nature moves slowly – you won’t achieve your perfect lawn overnight. And there are all sorts of variables in lawn care that are out of your control. I should know – I’ve been doing this job for 30 years and so far, no two lawns and no two years have been the same.
The health and the appearance of your lawn is heavily influenced populations of soil microbes that you can’t even see. As well as ever changing weather, what treatments the grass may or may not have had in the past, how you use your lawn, what’s surrounding your lawn —- the list is endless.
So I’m finishing with the beginner DIY lawn care tip that will affect how you see your lawn – be patient. If you follow these tips you WILL see results but don’t worry if you don’t get your perfect lawn straight away. Caring for a lawn is like peeling an onion – there are lots and lots of layers. With each action you’ll be nearer to your goal. Expect to shed a few tears along the way. But don’t give up – just know that achieving your version of perfection will be the best reward ever.
For more beginner lawn care tips, follow my YouTube Channel

