
If you feel that your lawn needs a complete refurbishment, this article is for you. We’re talking about how to completely replace a lawn.
Nearly every lawn needs replacing from time to time. So if yours is looking very sorry for itself and you don’t feel that a change in your lawn care regime will be enough to bring it back to its full glory, then there’s only one thing for it. Start again.
You may have been the victim of a chafer grub attack, perhaps your lawn has been invaded by ugly weed grasses. Or maybe you’ve recently moved to a new home and are busy improving the garden. Whatever your reason for replacing your lawn, I have an easy 10 step process for you to follow.
My Step By Step Guide: How To Completely Replace A Lawn
- Use a systemic weedkiller to kill leaves and roots of all plants on your lawn
- Wait 3-4 weeks until the lawn is completely brown
- Use a scarifier to remove dead vegetation
- Aerate the area to relieve compaction
- Apply topdressing to level the lawn and make a seed bed
- Sow your grass seed and cover with another layer of topdressing
- Add pre-seeding feed to encourage seeds to grow
- Water the area and keep moist until your new lawn is growing strongly

Why use seed instead of turf?
Now the obvious solution to having an ugly lawn would be to rip up the grass, churn up the soil and lay turf. But I have a problem with that. Not because of my bad back, but because all of that digging really does upset the balance of mini beasts and microbes in the soil. Plus, establishing turf uses vast amounts of precious water.
My method of completely replacing a lawn without using turf is kind to the environment and, although there is some physical work, I feel it’s less labour intensive than turfing.
Start by killing off the old lawn
This is stage 1 of your lawn replacement project but, as in all things gardening related, it pays to plan ahead. Stage 2 is going to involve getting rid of dead vegetation. Mow your lawn as short as possible now and remove the clippings to make sure you’ll have less work when you get to stage 2.
To get rid of your old, tired and ugly lawn, I recommend using a systemic weedkiller. Now anyone who watches my videos will know that I never advocate using chemicals unless it’s absolutely necessary. In this case, I feel this is the only way to get rid of unwanted plants and be sure that they won’t come back. Some weeds (and weed grasses) are absolute demons for regenerating themselves from the tiniest piece of root left in the ground. Digging doesn’t guarantee that every piece of the plant will be removed. So herbicide it is.
Be sure to read the label carefully and make sure that you buy a systemic weedkiller. One that will kill the roots as well as the leaves. Follow the manufacturers instructions to the letter. And be careful not to splash any of the spray onto your beds and borders – it works on ALL plants, not just weeds.
I like to add a dye into the water so that I can see exactly where it’s landed. Otherwise it’s all too easy to miss a bit.

Remove dead vegetation
3-4 weeks after applying the herbicide, your lawn and all the weeds in it should be well and truly dead.
Use a scarifier to remove all of the dead plants and clear the surface of the soil. If you have a tiny lawn you COULD do this with a springtine rake but it’s hard, boring work and takes a long time. I wouldn’t recommend it.
Start with your scarifier on its highest setting and make several passes of the area. Each time you pass over the lawn, drop the blades another notch. Keep moving the dead stuff off the lawn as you go.
When I set out to replace a lawn in my Dad’s garden, it took 6 passes with the scarifier to clear the soil and we took several builder’s bags full of debris to the dump. It was incredibly satisfying to see the results though.
Aerate the soil
Aeration is a great technique for relieving compaction with minimal disruption to the important soil microbes that actually help plants to thrive. A hollow tine aerator will allow air and water to move freely in the soil profile and also creates some nice deep planting pockets for some of the seed we’ll be applying later.
You can either use a blower to move the little soil plugs onto your beds and borders, or you can break them up with the back of a rake.
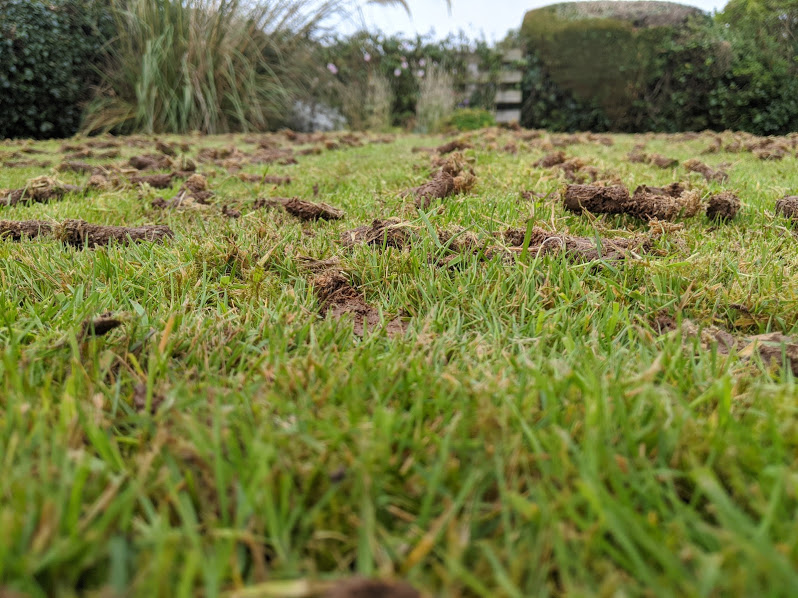
Hollow tine aeration removes plugs of soil from beneath the lawn’s surface and effectively makes air holes to allow the roots to breathe easier. This picture shows a healthy lawn after a routine renovation, if you are aerating while you replace a lawn, you’ll see all soil and no grass
Choosing your seed
A quick note here about choosing the right type of grass seed for your new lawn. If you’re not sure which species and varieties will grow into the perfect lawn for your lifestyle, read my blog on choosing seed. It could save you a lot of time and money in the long run.
What is the right grass seed for your lawn?
Topdressing and seeding
Now is your opportunity to level out any lumps and bumps on your lawn with a layer of topdressing. I like to make a kind of earthy lasagne with the topdressing and seed. With some of the seed sandwiched between 2 layers of topdressing.
Start with the seed. Most grass seed blends are sown at around 30grams of seed per square metre. If you are using my lasagne method, divide your seed in half and apply 15 grams per square metre at this stage.
Next apply 1-2 cm of topdressing to your lawn. If your soil is very sandy, you could use sterilised topsoil as a topdressing. If you have a clay soil, a 70:30 mix of sand and topsoil will help improve the texture. NEVER use peat. Not only is it unsustainable, it’s messy when wet and repels water when it’s dry.
For a large lawn, a topdressing spreader is well worth the investment as it will save you both time and energy
Rake your topdressing all over the lawn, adding a bit extra wherever there are dips in the lawn. Use the back of your rake to break up any large lumps. You’re looking for a texture similar to the topping on an apple crumble. Tread the topdressing to firm it down. Not too firm mind.
Apply the rest of your seed and give it another rake over to cover most of it up and make it harder for the birds to pinch.
Finally, carefully apply a granular pre-seeding (or preturfing) feed and water it in well.
All you need to do now is wait for Mother Nature to do her thing. Be sure to not to let the seed bed dry out until those new green shoots are growing really strongly.
Mowing Your Lawn For The First Time
Check out my favourite landscaping rake to make it easier to replace a lawn
Recommended lawn care tools and products to help you replace a tired lawn